Click for main page

(Advanced Activity)


Make Your Own Slippers


slippers


The Inuit call warm liners that are worn inside of sealskin boots "pinirak". Pinirak used to be made from animal fur such as arctic hare or arctic fox. But ever since the Hudson's Bay Company introduced duffel blankets to the north, this material has also been used to make warm kamik liners.

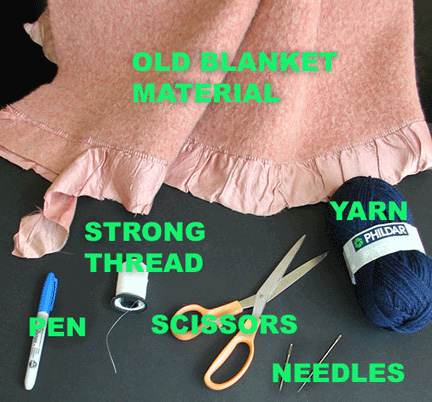
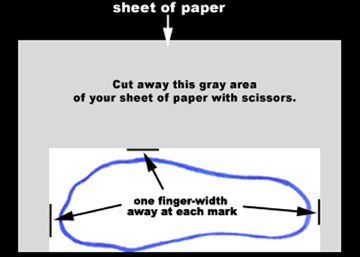
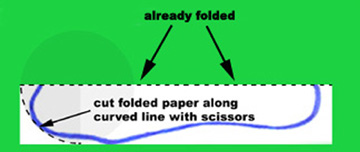
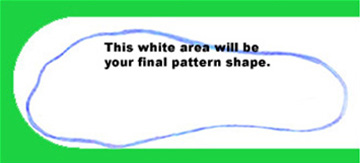
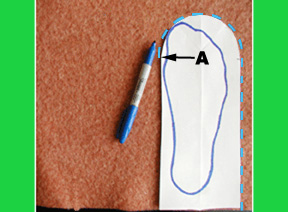
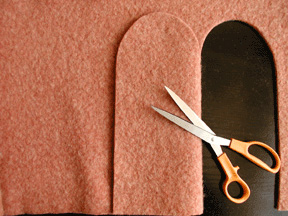
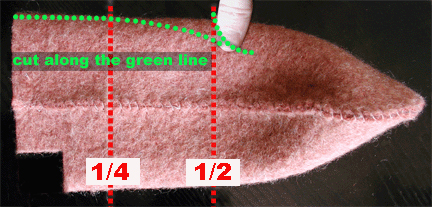
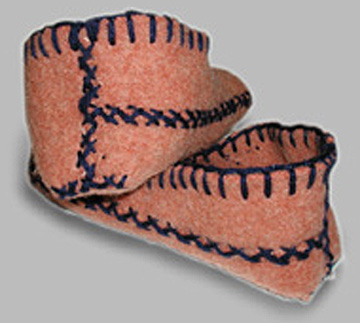
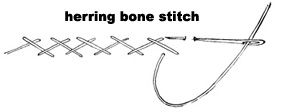
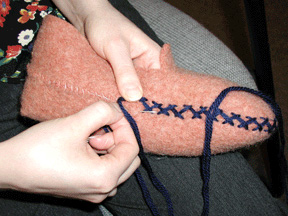
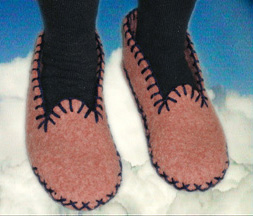
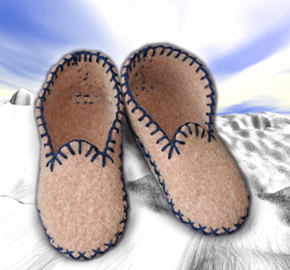
Beginner kamik makers are first taught to sew by making items such as pinirak from blanket material, which is easy to push a sewing needle through and requires only simple stitches.

You can recycle old blanket material by making pinirak from it. Pinirak may also be worn as slippers. Here is how you can make a pair of slippers that are certain to fit your own feet. It would be a good idea to have an adult help you with this project if you are not already experienced at using scissors and needles.

These instructions will show you how to make a pair of kamik liners that have no leggings. They may be worn as slippers.

Safety always comes first. Be sure to get help from an adult if you are not experienced at sewing with scissors and needles.


What you will need

You will need some duffel material such as from an old blanket, strong thread, yarn, a pen, a pair of scissors, a darning needle, and another sewing needle for the thread.

You will also need a sheet of paper for making the pattern.


Making the Pattern


Draw the outline of one of your feet on a sheet of paper.

Make sure that one side of your foot is flush with the edge of the page.


Put three marks on the paper at each of the following points:

A) One finger-with past the tip of your big toe outline.

B) One finger-width past the widest part of your foot outline.

C) One finger-width past the heel of your foot outline.


Fold the paper in half lengthwise so that the edge of the page (A) meets the mark for the widest part of your foot outline (B).


Cut away the remaining portion of the sheet of paper.


With the paper folded lengthwise, draw a curved line for the toe section following the path of a circle.

Then cut along this line with your scissors.


Your final paper pattern should look like the white area of this picture.


First cuts and stitches of your slippers


Draw an outline of your pattern onto the blanket material, stopping at the point where the curve for the toe ends (A).


Cut along your outine with scissors.

Then fold the half-slipper shape onto the remaining blanket material and use the cut-out section as a pattern for the second half.

Cut out your second slipper in the same manner.


Sew each slipper section together along the outside edge using the overcast stitch. Use strong thread.


Cutting out the heels

Fold the slipper in half lengthwise with the line of stitching on the side.

Measure a square at one corner of the fold, with each side of the square one thumb width long. Cut out the square.


Cutting out the tongue and opening


With each slipper folded in half, cut as indicated in this picture.

The top of the tongue should be at half the length of the slipper.

The tongue should be one thumb-width long.


Sewing up the heels

Sew each slipper together at the heel with thread using overcast stitching.

Then do the decorative stitches as shown below.


The finishing touches

Use a contrasting colour of yarn for decorative stitching.

Use herring bone stitches to decorate along all of your overcast stitching.


Finally, use blanket stitching to decorate along the edges of the tongue and slipper opening.


Something to remember

Do your best but don't think that your slippers have to turn out perfectly.

Maybe you can make slippers for your friends or relatives. Who knows? One day you might even make them a pair of kamiks.


Copyright © Native Access to Engineering Programme